> ## Documentation Index
> Fetch the complete documentation index at: https://docs.matterai.so/llms.txt
> Use this file to discover all available pages before exploring further.
# Create Your Own GitHub App
> Set up a custom GitHub App to deploy MatterAI in your own environment
This guide walks you through the process of creating and configuring your own GitHub App for MatterAI, giving you complete control over permissions and data access.
## Prerequisites
* GitHub organization or personal account with admin privileges
## Step 1: Register a New GitHub App
1. Navigate to your GitHub organization settings (or personal settings)
2. Select **Developer settings** > **GitHub Apps** > **New GitHub App**
3. Configure the basic app settings:
* **GitHub App name**: Choose a descriptive name (e.g., "YourCompany MatterAI")
* **Homepage URL**: Your company website or internal documentation URL
* **Callback URL**: `https://matter-backend.example.com/api/v1/auth/github/callback`. Replace your domain later.
* **Webhook URL**: `https://matter-backend.example.com/github/webhook`. Replace your domain later.
* **Webhook secret**: Generate a secure random string to validate webhook payloads
Keep your webhook secret secure. You'll need to provide this to your MatterAI instance during configuration.
## Step 2: Set Required Permissions
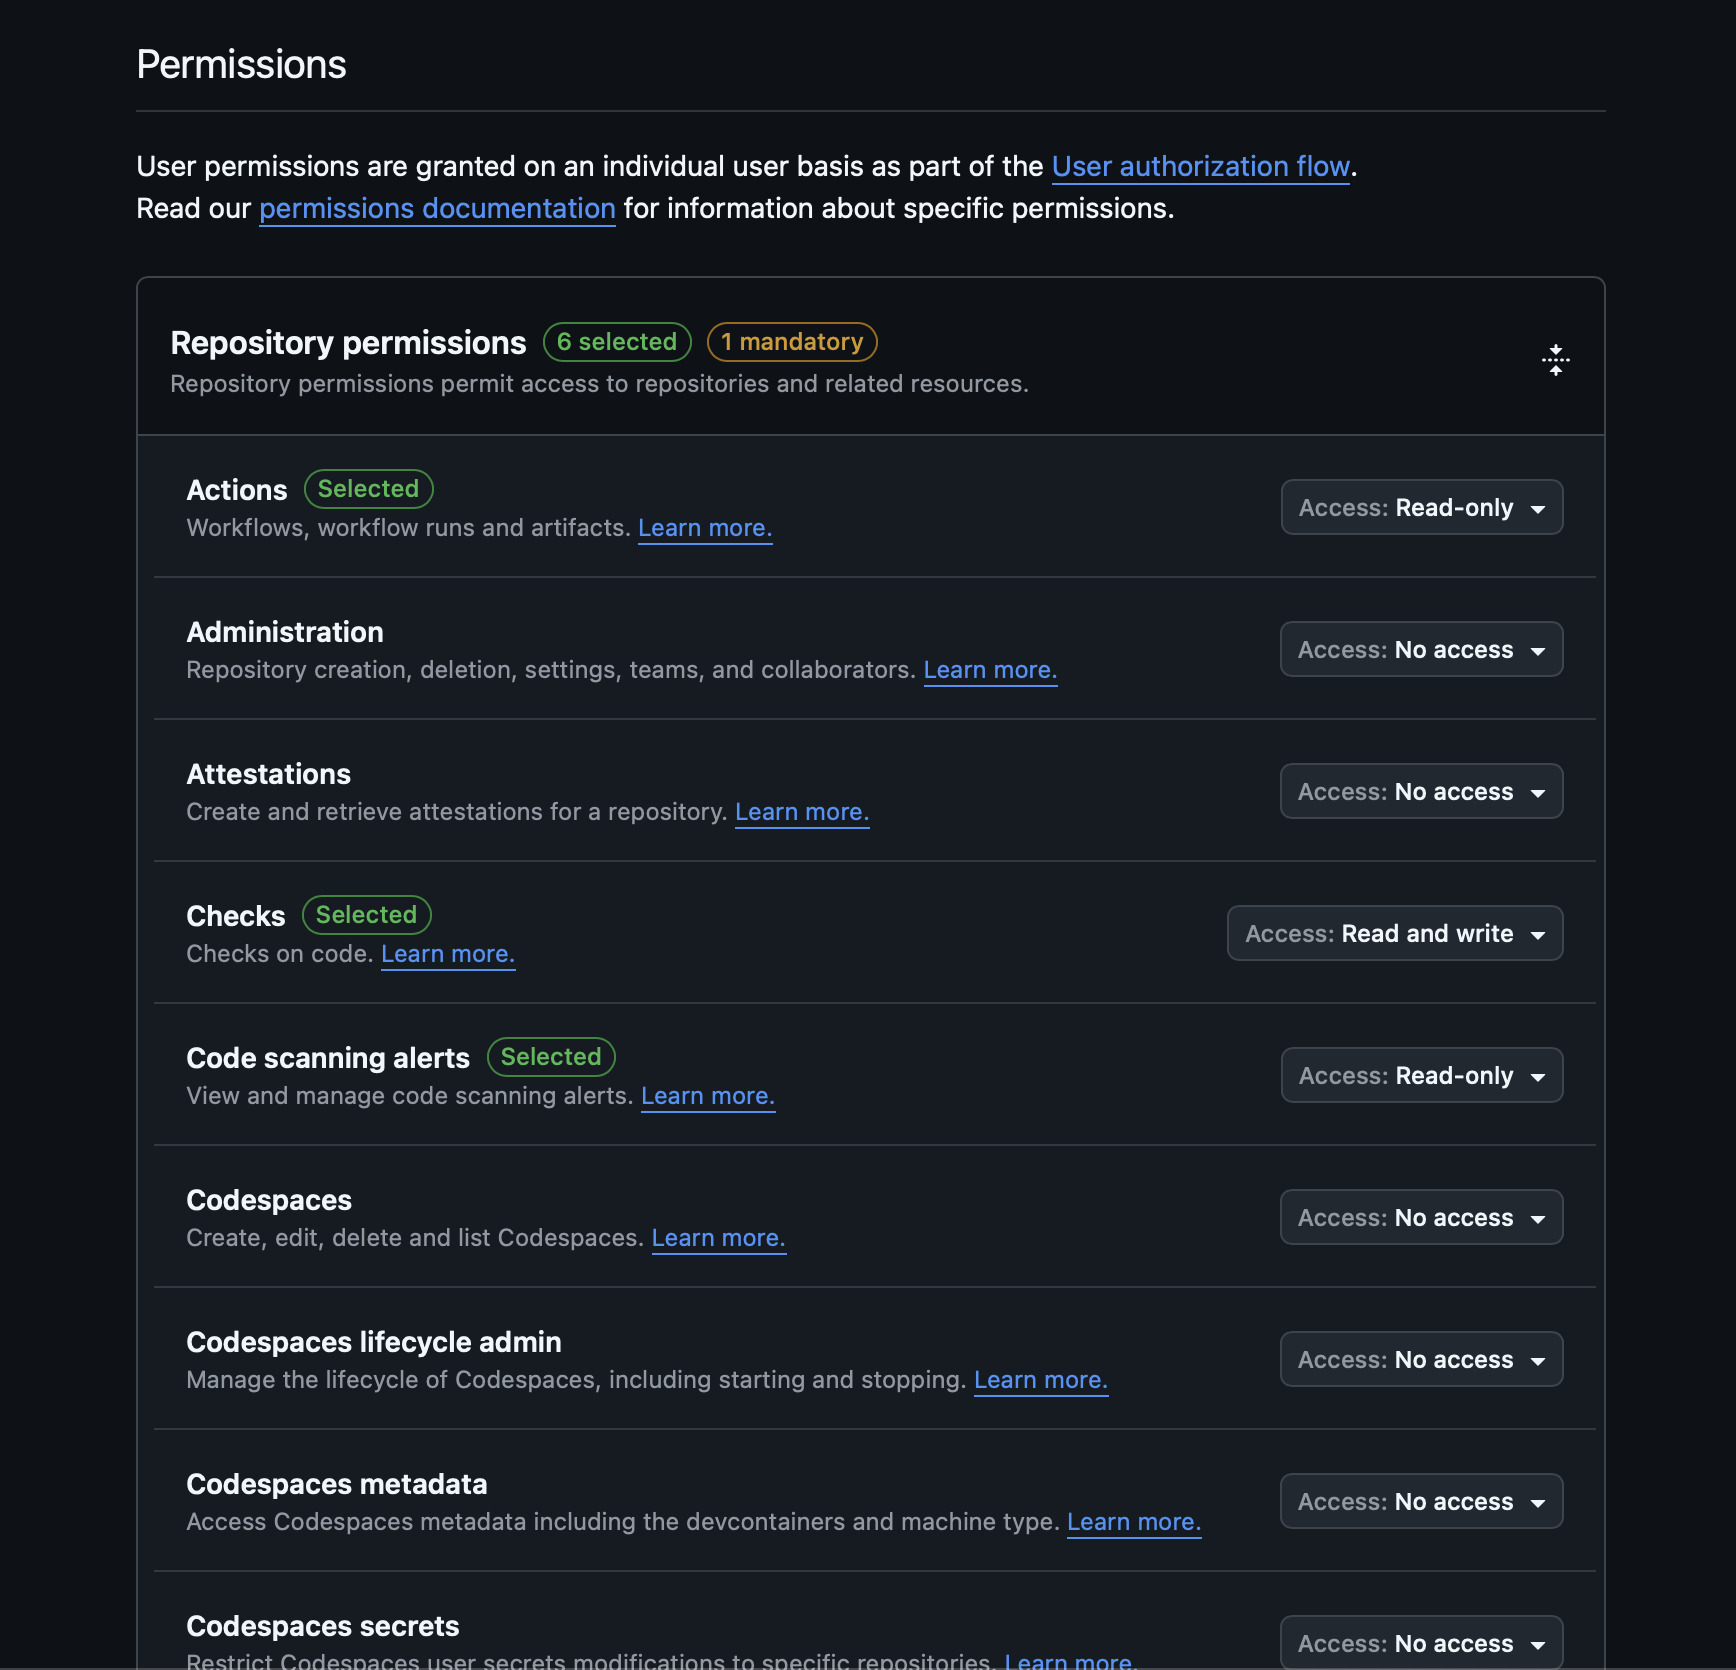
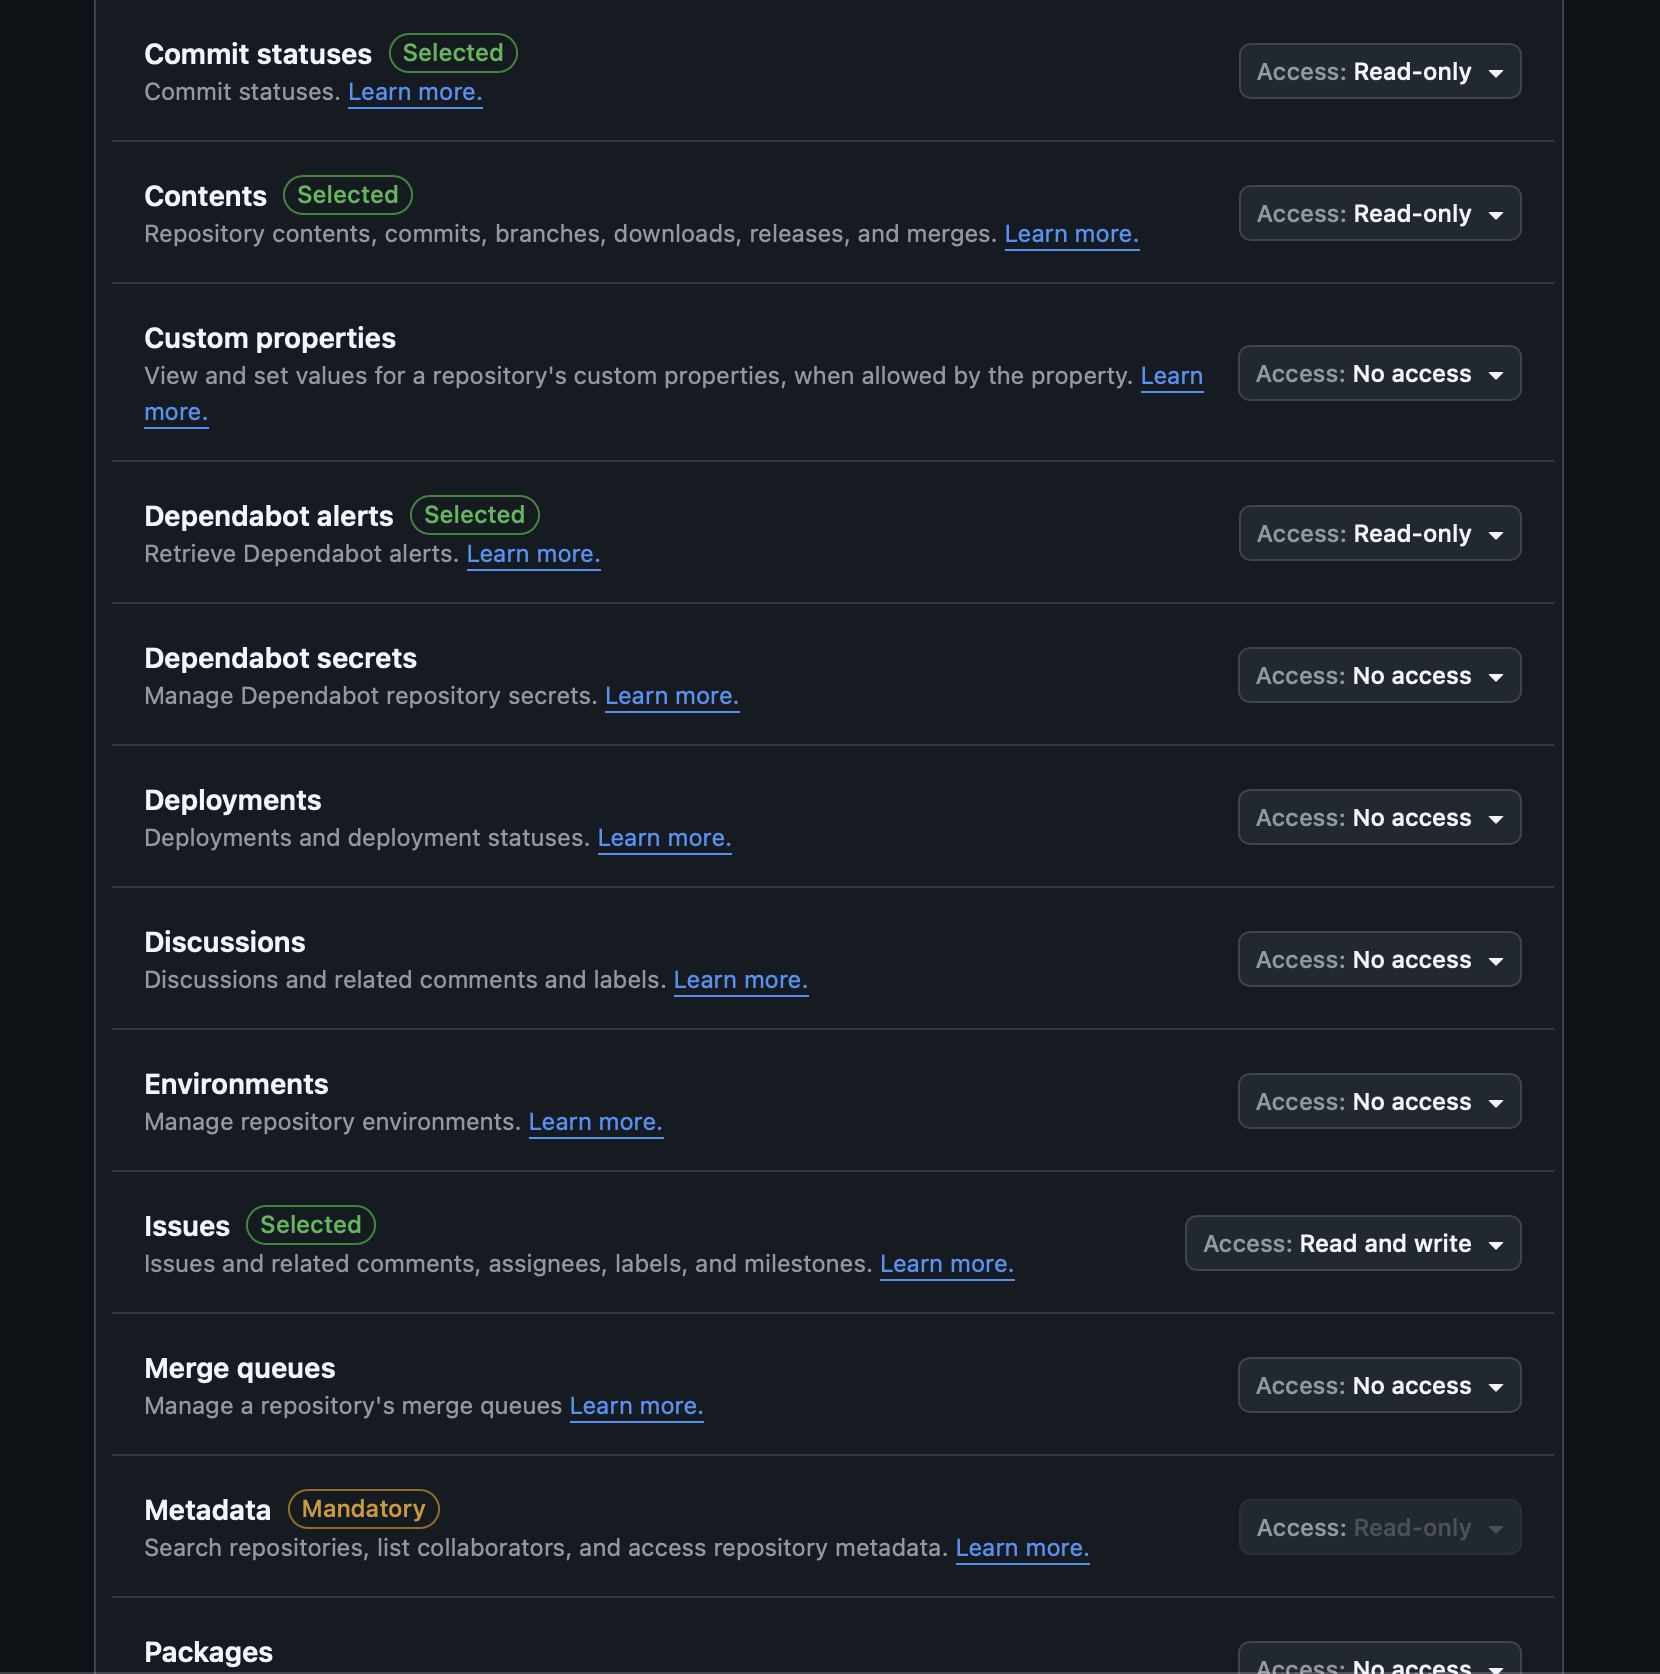
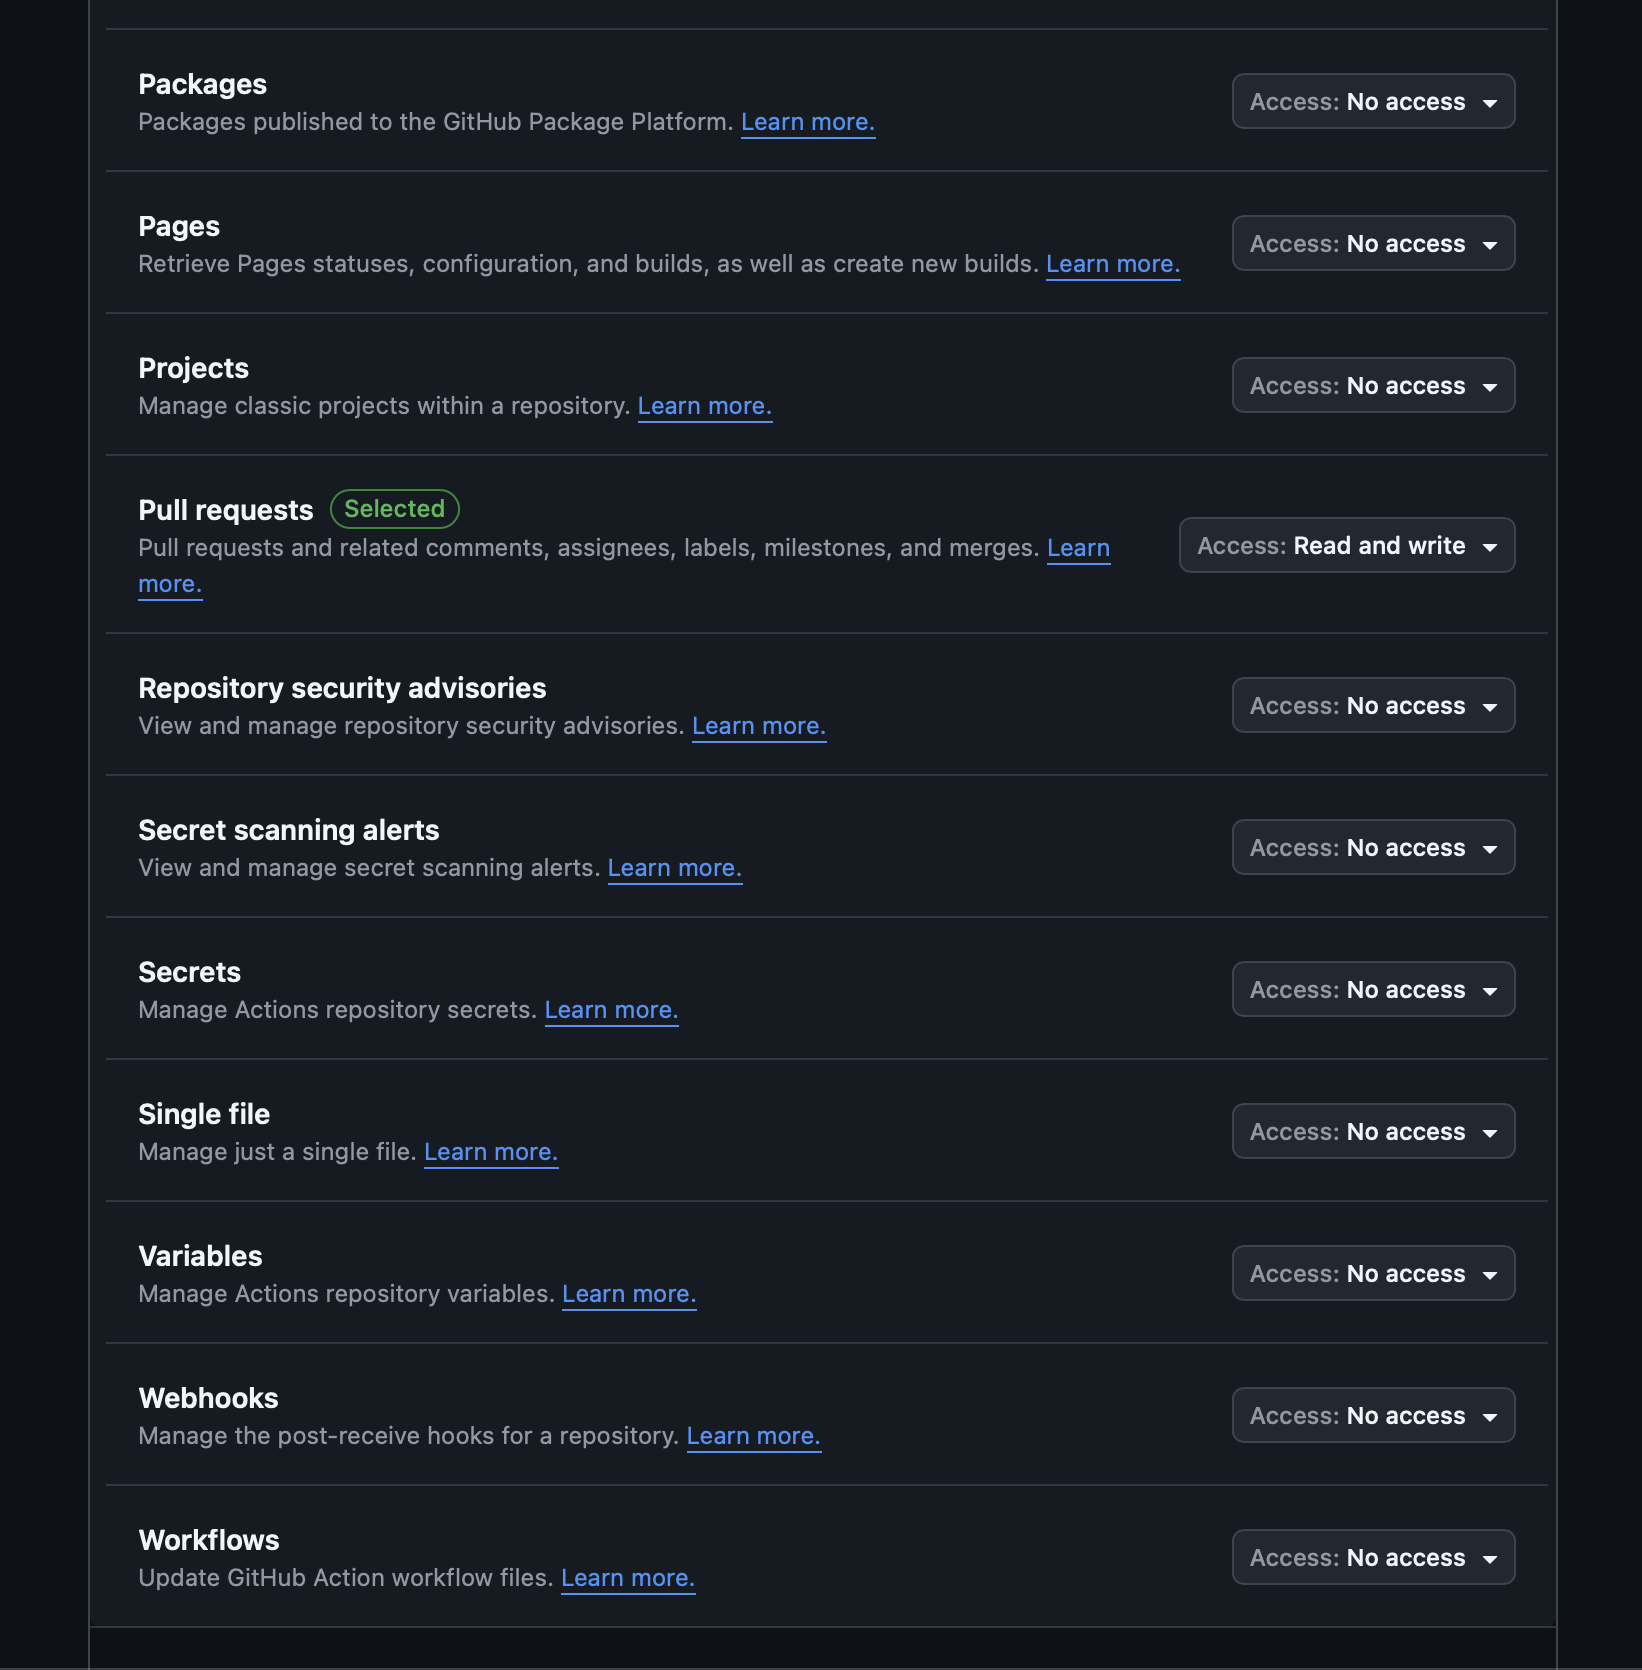
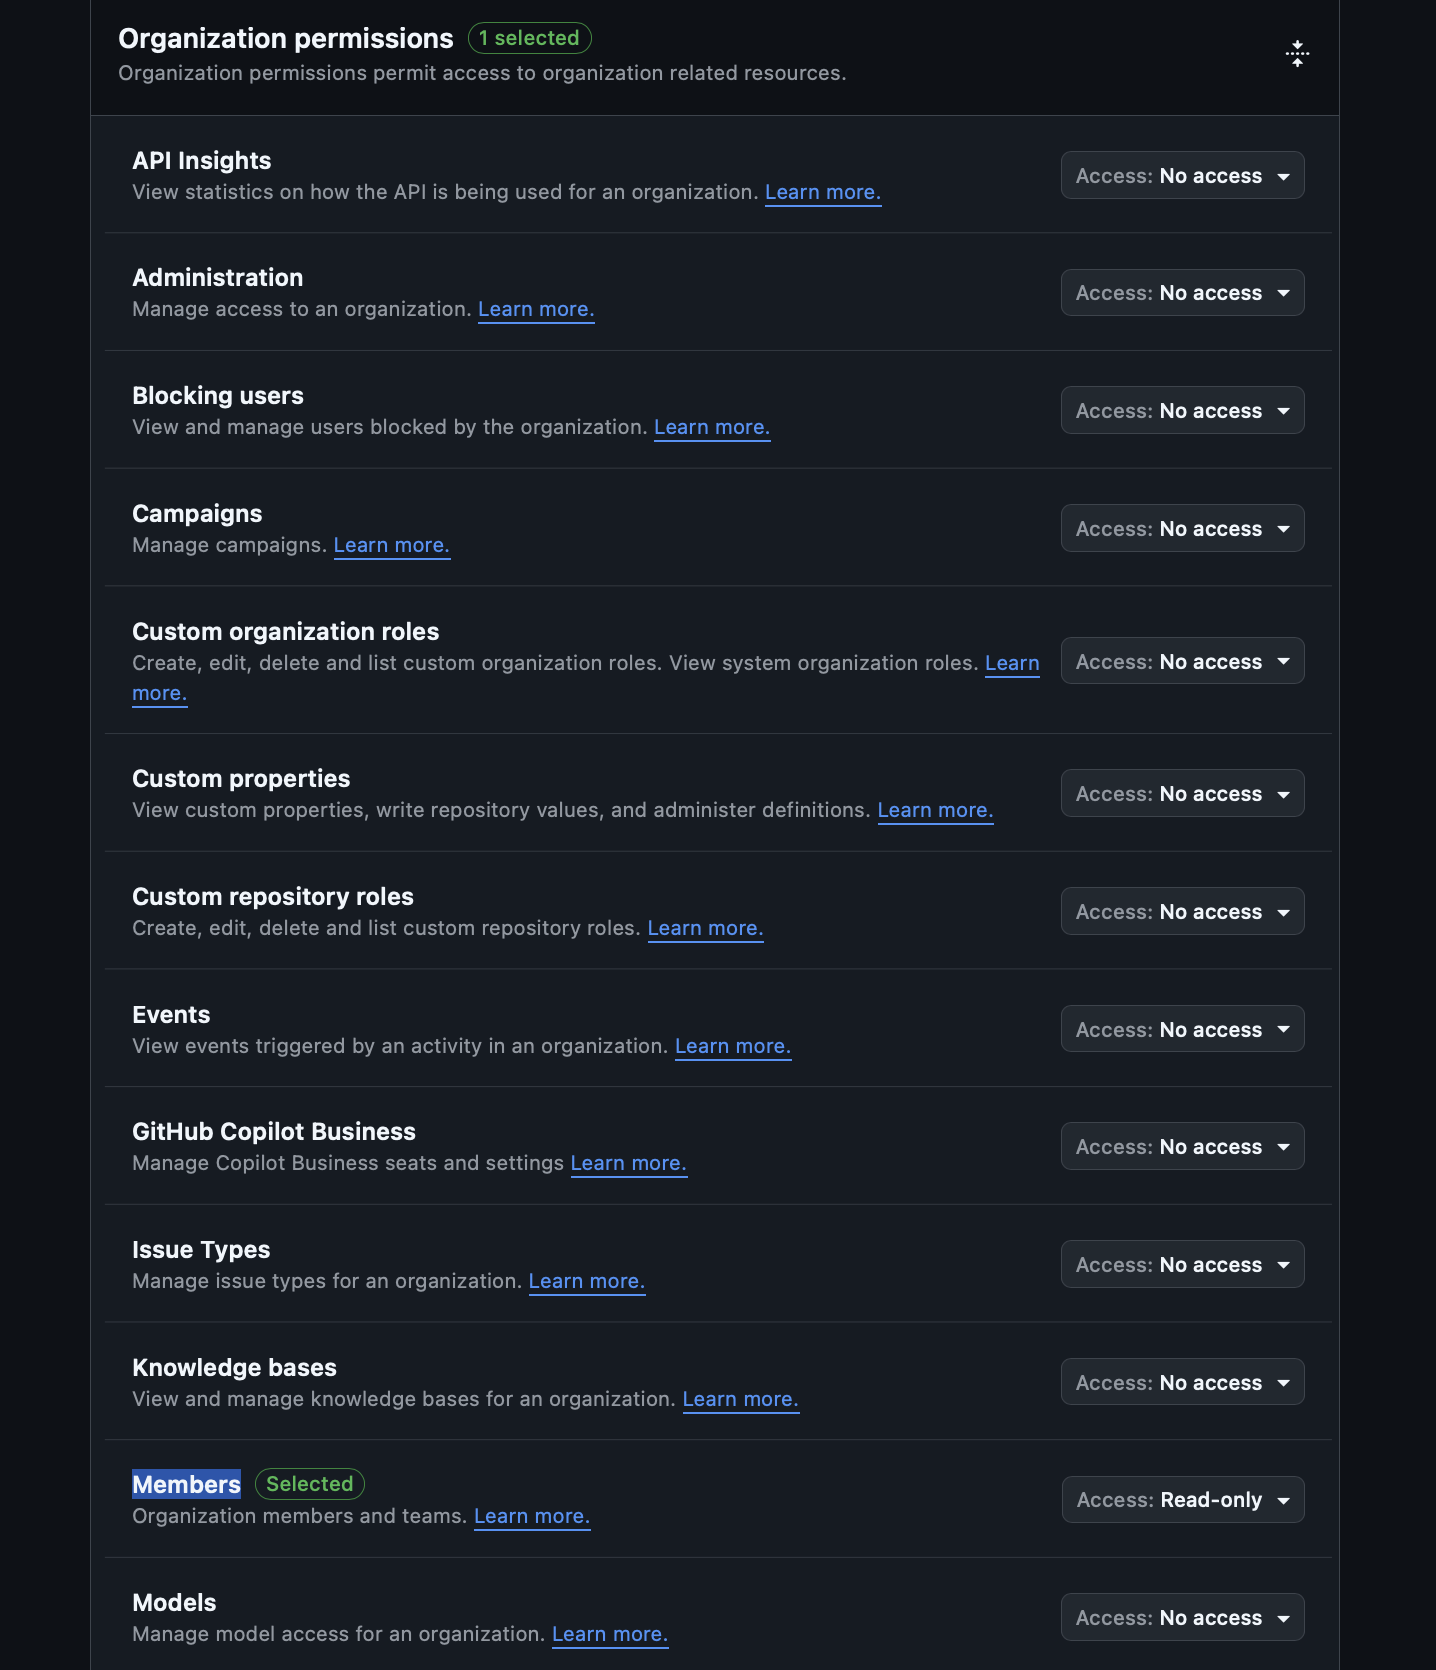
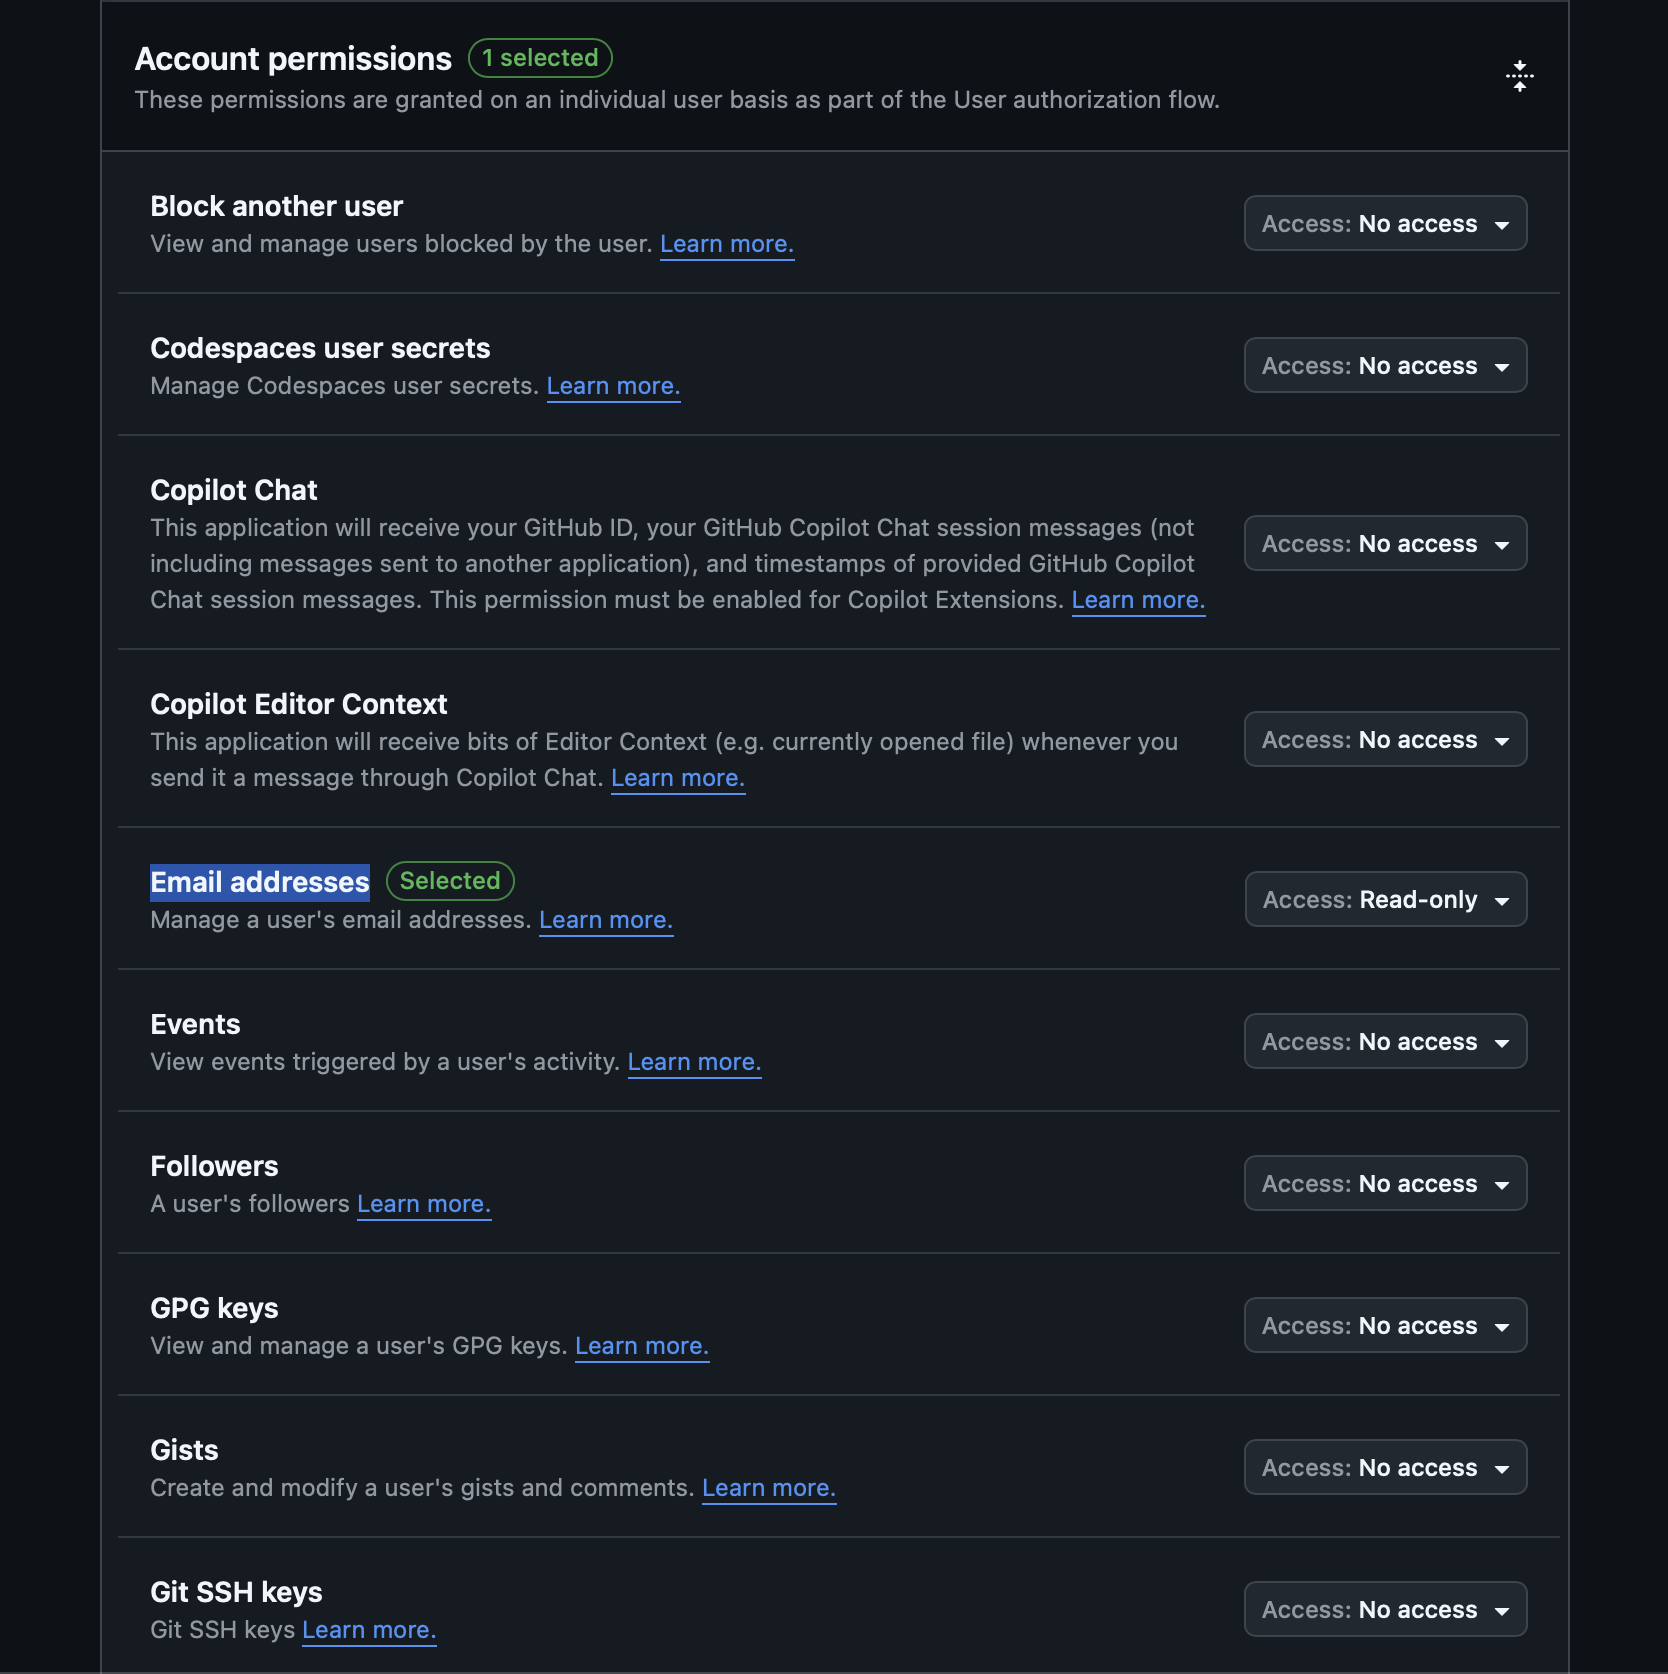
MatterAI requires specific permissions to function properly. Configure the following permission settings:
### Repository **Permissions**
 ### Organization Permissions
 ### Account Permissions
 ### Subscribe to Events
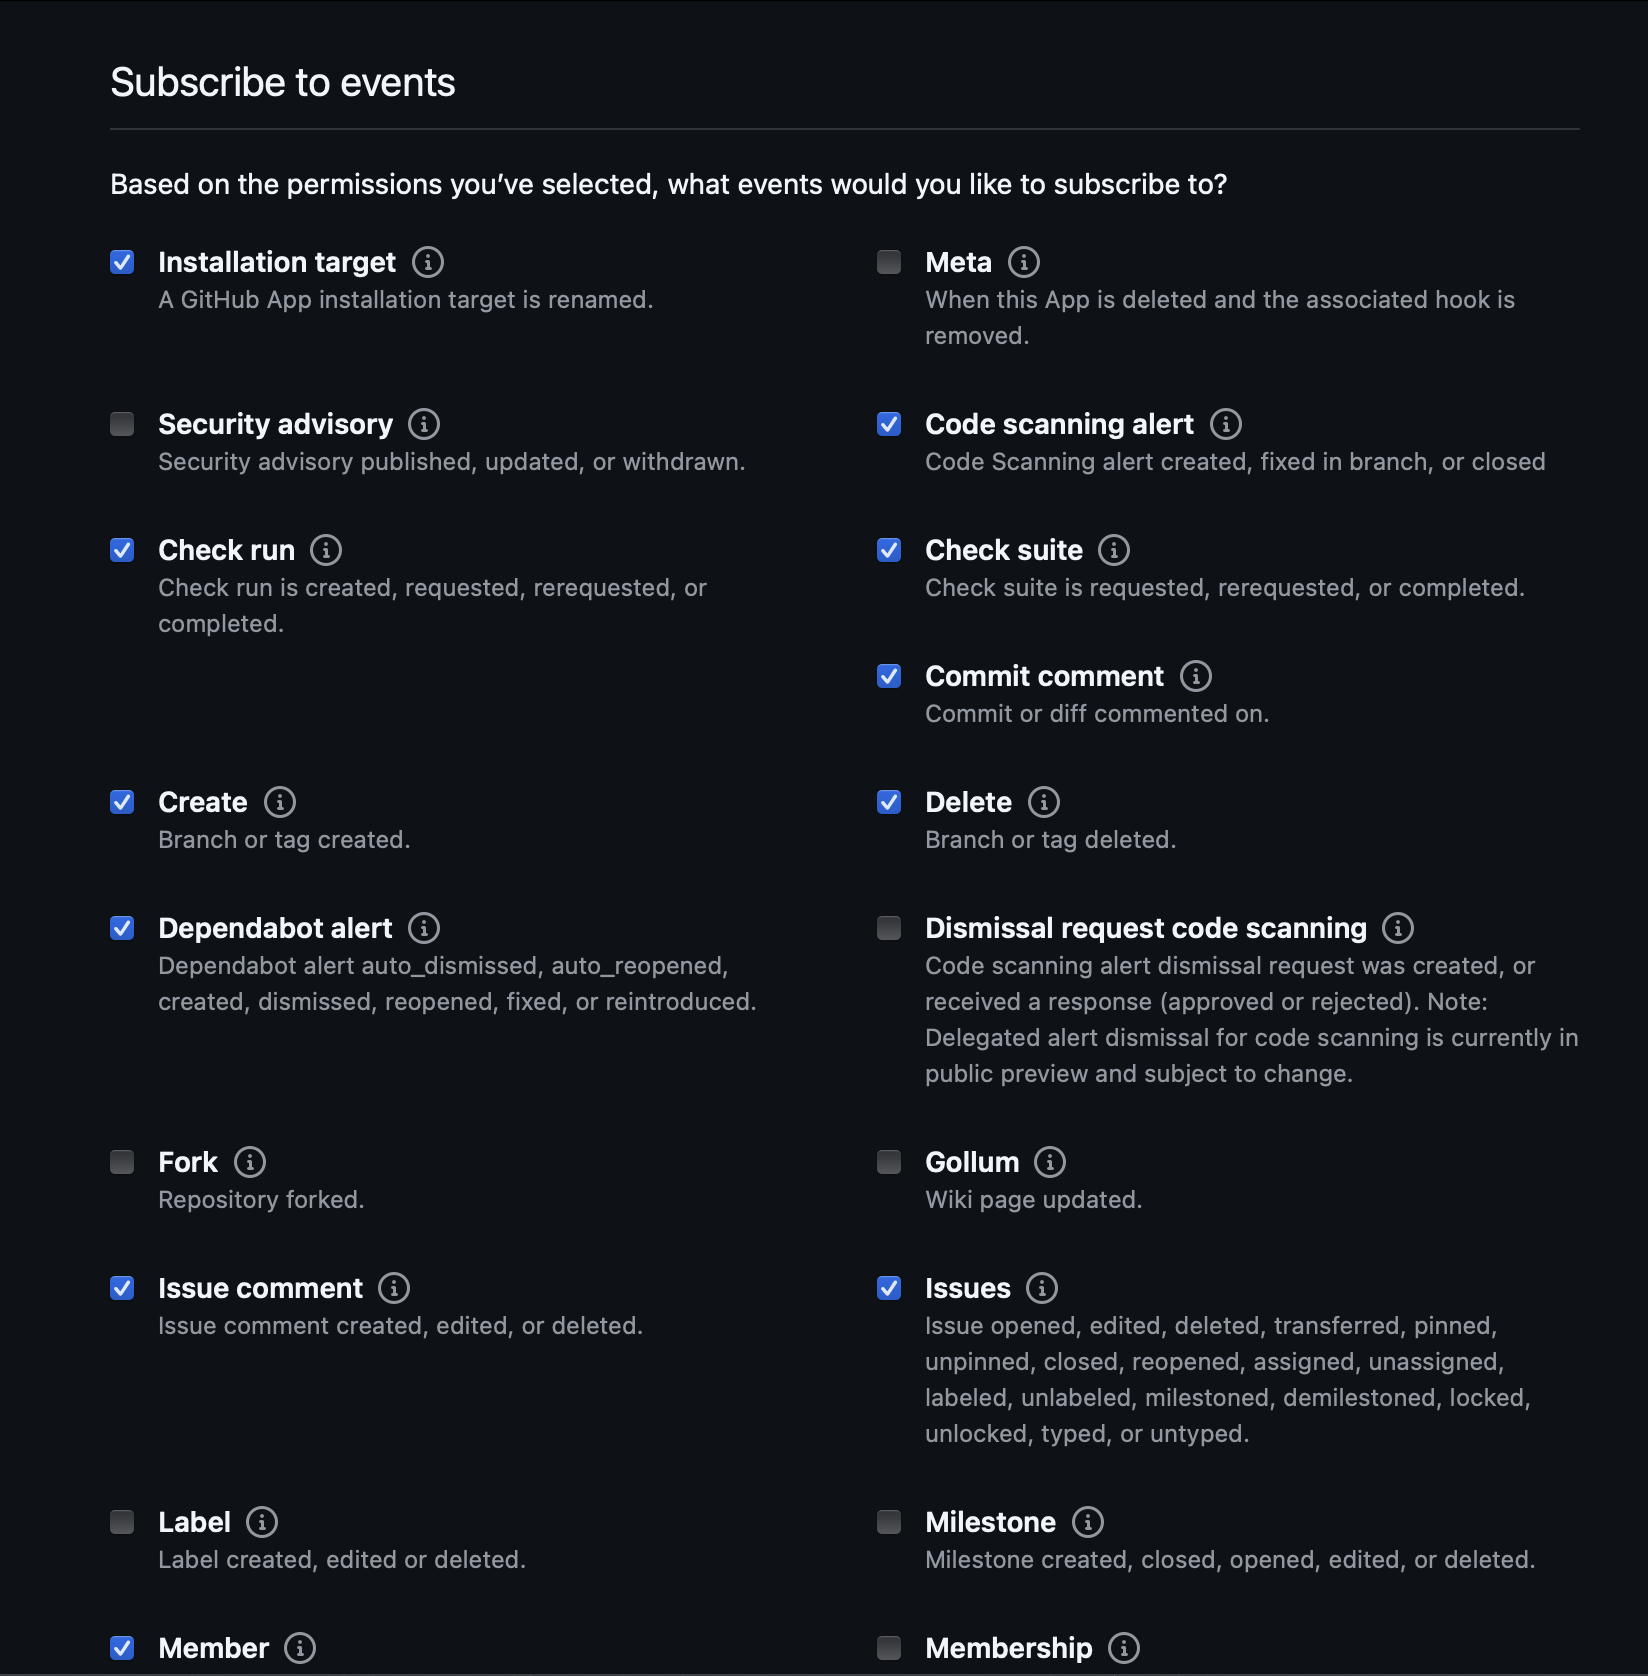
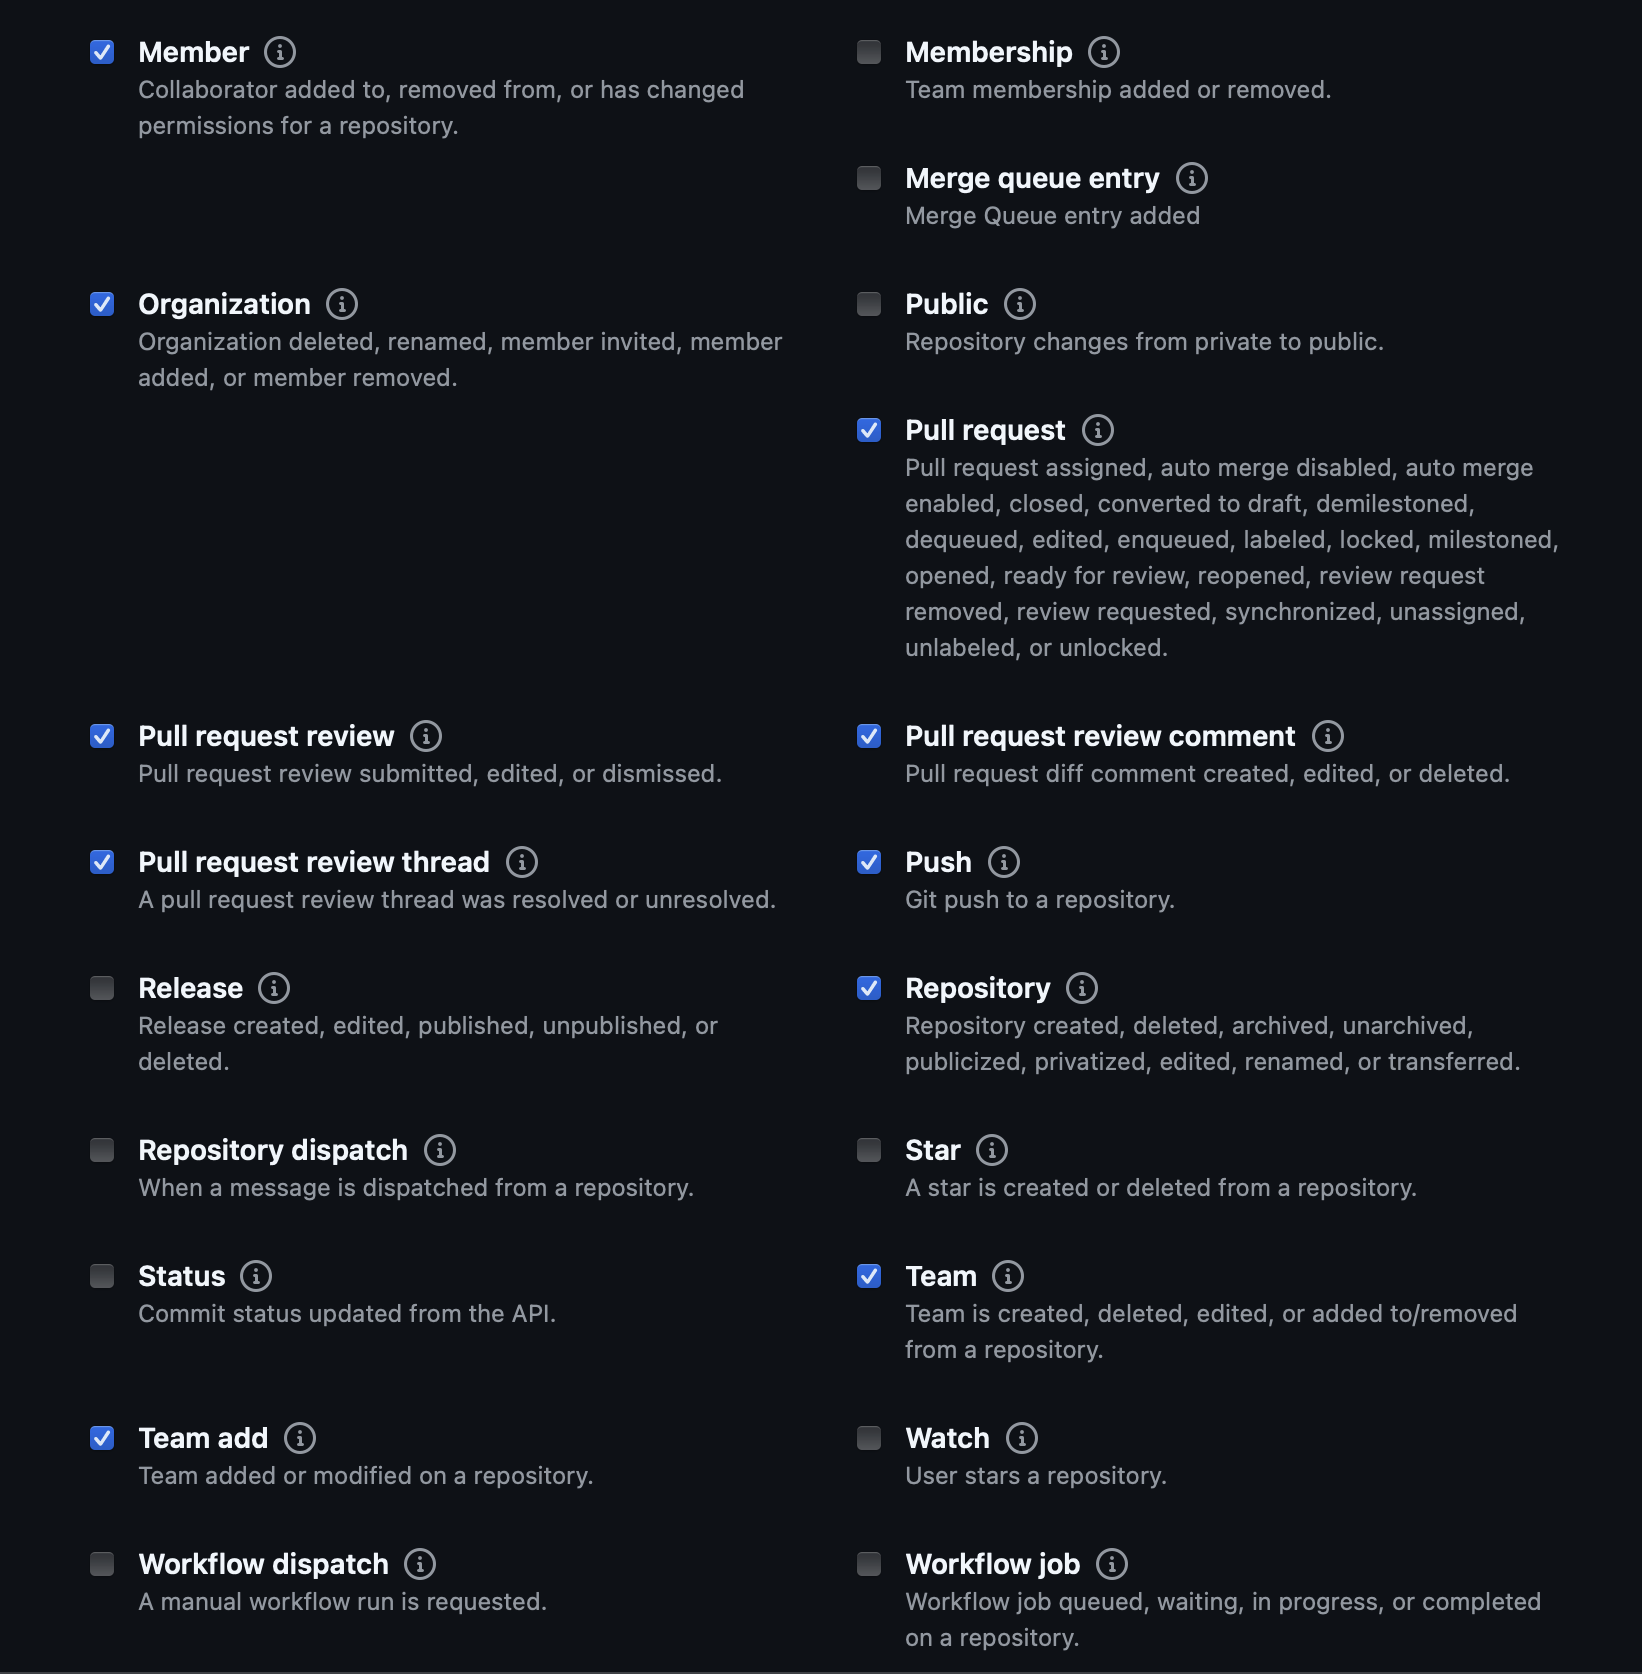
Enable the following webhook events:
### Subscribe to Events
Enable the following webhook events:
 ## Step 3: Generate Private Key
1. After creating the app, scroll down to the "Private keys" section
2. Click **Generate a private key**
3. Save the downloaded `.pem` file securely
The private key is generated only once and cannot be recovered if lost. Store it securely as you would any sensitive credential.
## Step 4: Install the GitHub App
1. Navigate to your GitHub App's settings page
2. Click on **Install App** in the sidebar
3. Choose the organization or account where you want to install the app
4. Select the repositories you want MatterAI to have access to
* You can choose specific repositories or grant access to all repositories
## Next Steps
Now that you've created your GitHub App, you can proceed to deploy MatterAI using one of our self-hosting options:
Deploy MatterAI using Docker Compose
Deploy MatterAI on Kubernetes using Helm charts
## Step 3: Generate Private Key
1. After creating the app, scroll down to the "Private keys" section
2. Click **Generate a private key**
3. Save the downloaded `.pem` file securely
The private key is generated only once and cannot be recovered if lost. Store it securely as you would any sensitive credential.
## Step 4: Install the GitHub App
1. Navigate to your GitHub App's settings page
2. Click on **Install App** in the sidebar
3. Choose the organization or account where you want to install the app
4. Select the repositories you want MatterAI to have access to
* You can choose specific repositories or grant access to all repositories
## Next Steps
Now that you've created your GitHub App, you can proceed to deploy MatterAI using one of our self-hosting options:
Deploy MatterAI using Docker Compose
Deploy MatterAI on Kubernetes using Helm charts